Posts Tagged With: tiny house on wheels

Tiny House for Sale?

First off, let me start by saying, I LOVE MY TINY HOUSE!

We have no regrets building it either.  We both learned a lot and mostly, had fun during the process.  But, we don’t actually live in our tiny house. Yes, it’s our bedroom in the non-winter months. And it’s where we stay if we have company since the current home is just a one bedroom. But other than that, it’s just something very pretty to look at and sit in and daydream about the life we thought we were going to have.

When we started building the tiny house, our thoughts were that we would live simply, and maybe just work seasonally.  But then, we were bit by the farming bug.  And not to say a farmer can’t live in a tiny house – I’m sure some do, but with farming comes a lot more stuff and that doesn’t always work with tiny.

Probably the real reason we never lived in the tiny house is because while I was looking to live simply off-grid – Pete was looking to live with unlimited electricity and out buildings (it took him one winter off-grid in the tiny house to realize that).  As a compromise we purchased our current farm with a rough, fixer upper “pole barn” house and it was just easier to live in the “pole barn” house than in the tiny house.  We intentionally kept the tiny house simple without running water and because we wanted a larger kitchen, we skipped putting in a bathroom with the intention of building a sauna/bath house next to the tiny house.  As a result, the tiny house didn’t serve us the way we needed it to.

We’ve talked about listing the tiny house on Air B&B and we’ve talked about putting it on the original property to serve as our “camp”, but because we love it so much, it just seems like someone who will actually live in it as their home should enjoy it as much as we have.  With that – we think we’re ready to sell.

If anyone is interested in purchasing our tiny home, most if not all information can be found in this blog.  We wrote about pretty much the entire building process. Any other questions can be emailed to thehomesteadfarmanddairy@gmail.com.  We are asking $39,000.  Every build and design decision that went into the tiny house was done with quality and health in mind.  We didn’t skimp on materials and we always chose the least toxic most environmentally friendly building materials possible.

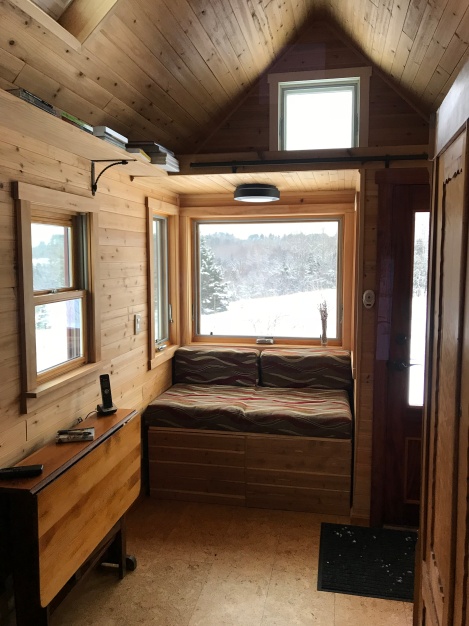
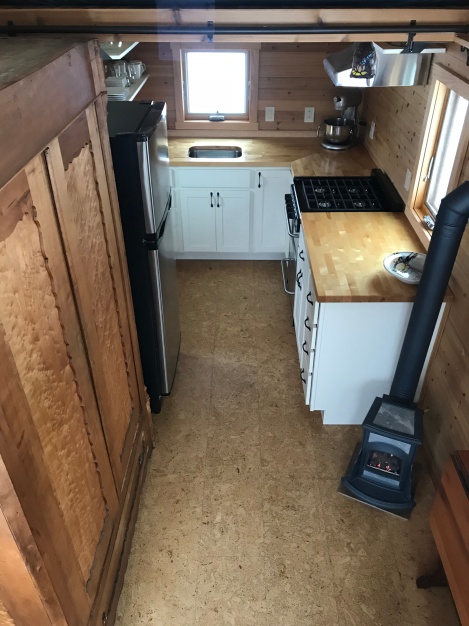
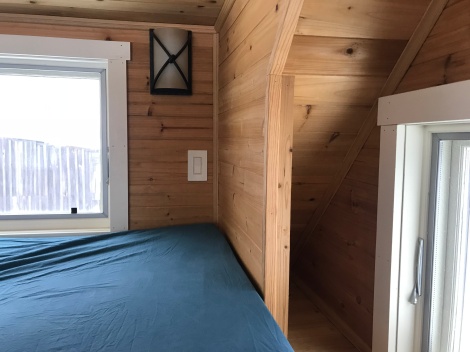
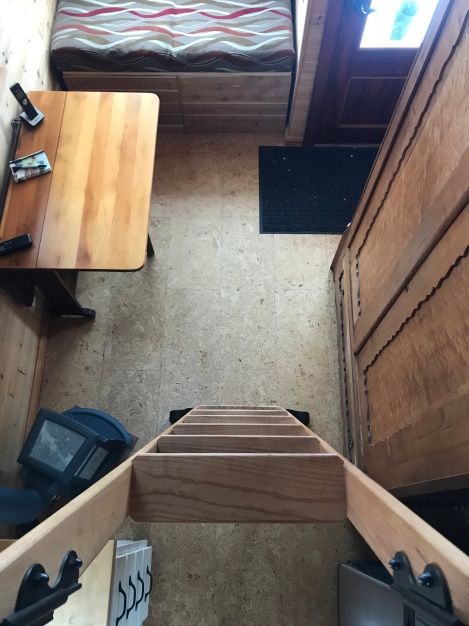
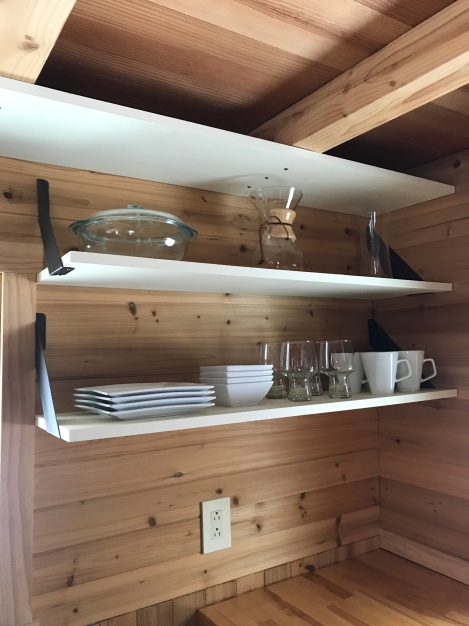
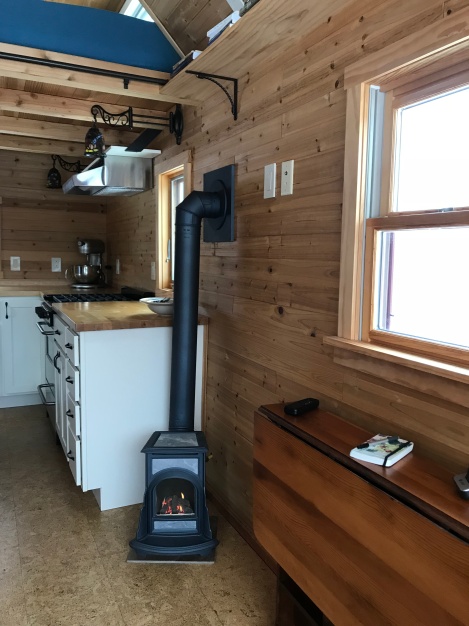
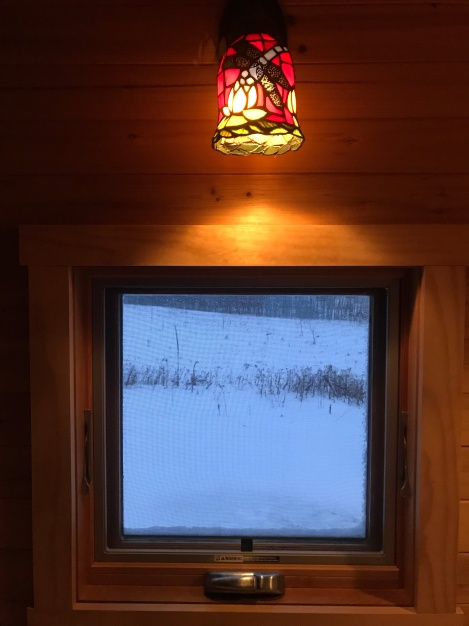
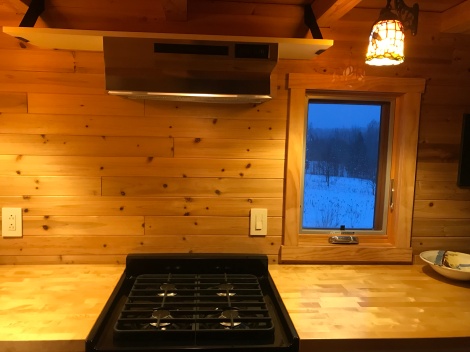
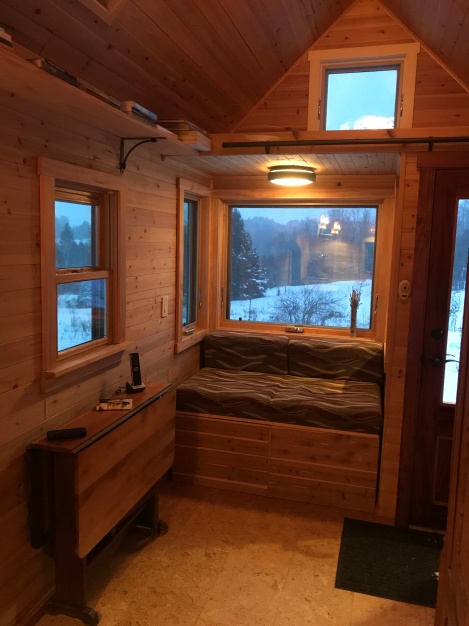
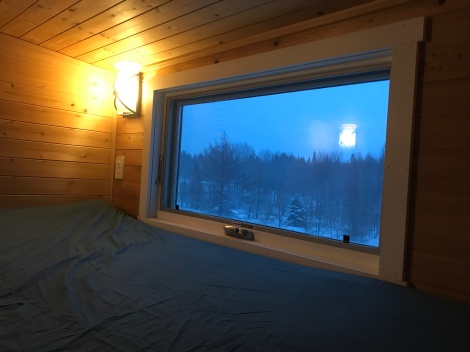
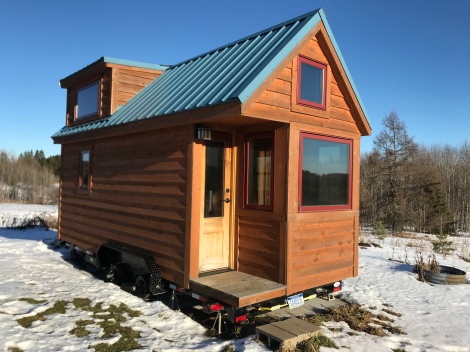
I always intended on having a post full of final pictures but the tiny house never seemed done. I think that’s because we never really made it our home. But below is what it looks like now.  Enjoy!
 

img_3077img_3097img_3100img_3103img_3105img_3107img_3109img_3111img_3115img_3117img_3119img_3128img_3141img_3144img_3145img_3147img_3151img_3157

Categories: Tiny House For Sale, Tiny House Living | Tags: , , , | 4 Comments

The Tiny House Has Insurance!

Just before moving the tiny house out to the property I called Vast here in Marquette to inquire about insurance. I spoke with Karen and explained that I wanted to make an appointment to discuss insurance. When she asked for more imformation I explained that we were building something called a tiny house. She asked if she could find information about them online and I assured her that if she googled “tiny house” she would find more than enough information. I made an appointment to go to the office later that afternoon. When I showed up for the appointment Karen asked all sorts of questions about our little house. What was the square footage, how much had it cost so far, would it have a smoke alarm, would we anchor it to the ground…

She also told me that she called her insurance underwrite after she got off the phone with me and explained that she had a couple looking to get insurance for a tiny house. Her underwriter knew all about tiny houses and wanted to get one himself!

The tiny house is insured under a mobile home policy with a premium just under $400 a year. Compared to someone with a “real house” worth a couple hundred thousand dollars our policy seems rather pricy; however, in the insurance world, mobile homes are considered riskier and at $32 dollars a month we think it’s worth the price. I spoke with a coworker who’s camp is a mobile home and asked him what his premium was and he explained that he can’t get insurance on his camp because the mobile home is too old and that he would gladly pay $400 a year for coverage if he could get it.

Our policy covers $25,000 on the structure, $17,000 on personal belongings (I doubt we could even fit enough belongings in the tiny house to equal that), and $300,000 liability on the property. I did make an appointment with another insurance agency in town to compare policies. The other agent I spoke with seemed skeptical about being able to insure the tiny house, but he did say that the Vast policy looked about right. He told me he would look into things and call me back either way…I never heard back from him.

We did have to wait to get our physical address before we could sign our policy and that involved calling the Sheriff’s Department to request a fire number. The fire number took a few weeks to be issued but once I was able to give Vast our physical address we were insured. And I did confirm that we’re covered if the house is stolen!

Categories: Tiny House Insurance, Tiny House Living | Tags: , , | 15 Comments

We Have a Shower

When we first started designing the floor plan of our tiny house, we were planning on putting in a small bathroom like so many of the other tiny houses out there. We had concerns, however, regarding freezing issues in the winter. We weren’t quite sure how we were going to handle the gray water coming from the shower. You can buy heating pads for a gray water tank, but those require electricity; something we don’t have here at the property. As far as dealing with black water, we were planning on having a composting toilet. However, after speaking with our local health department, we were informed that composting toilets are not allowed and neither are incinerating toilets. After being told that, we decided to eliminate the bathroom in the tiny house all together and eventually build a sauna bath house next door. The reason we called the health department in the first place is because friends of a friends home was condemned by the health department when they found out they had a composting toilet. They weren’t exactly on the up and up, so I’m told, so that didn’t help their situation either.

In the meantime, we are renting a porta potty and have built an outdoor shower. In the next coming months, we will build an outhouse and pay the health department $200 for a privy permit application fee. Prior to building the outdoor shower, we purchased something called the Zodi Extreme. It consists of a stainless steel canister (looks like a milk can) that sits atop a propane burner. There is a thermometer on the side to let you know how hot the water is and when it gets to your desired temperature you manually pressurize the tank with a pump at the top. Then you turn on your nozzle and enjoy a hot shower. It works quite well and we would highly recommend it. They also have battery operated units as well.

For the first couple of weeks we were using the shower without any sort of enclosure; but I prefer to have a tad more privacy and wanted an actual showering space. Keep in mind, we are on 40 acres and have no neighbors within sight of the tiny house, but I still wanted a shower enclosure.

Pete gave me quite a bit of grief when I wanted to hold off on working on the inside of the house to build a shower. He thought it was a huge waste of time. He has since realized how nice it is to have a place to shower, away from the bugs.

The design for the shower was in my head and rather than drawing out plans we started cutting and piecing together the enclosure. A few changes were made along the way and while the shower is perfect for us, it wouldn’t be ideal for a tall person. We made the base out of treated lumber and bought untreated 2×4’s for the uprights. Our friend Jeff stockpiled some pallets for us for the siding and we screened the whole thing in with netting to have a bug free experience (the mosquitos are the worst they’ve ever been!). We used some scrap metal roofing for the top which we plan on painting to match our roof. The most expensive part of the project was the roll of screen, but we have a lot left over.

Now that the shower is complete we can get back to finishing the tongue and groove inside the tiny house

Categories: Outdoor Shower, Tiny House Living | Tags: , , | 25 Comments

Moving Day!

May 31, 2014 – The day has finally arrived! We moved the tiny house out to our property! The tiny house is far from finished but our lease is up and we are done paying rent!

We hired Terry and his very nice truck to move the tiny house from Pelkie out to Chatham. It took just over two hours and everything went very smooth. It was rather windy though and Terry mentioned that it would have been better if we had sway bars on the trailer. Since we didn’t, he just took it a little slower.

I was a jumbled ball of nerves when we moved the house last fall to my moms so this time I avoided coffee in the morning and also drove in front of the tiny house while Pete followed behind. I discovered being in front was way less stressful than watching the tiny house from behind. I only had to think about my home rolling down the road at 55 mph whenever I looked in the rear view mirror; which lets face it was every 45 seconds. But still I was much less nauseous this time around. I’m glad we don’t plan on moving the tiny house any time soon, but I think I would eventually get used to it if we traveled with it.

It will be interesting trying to live in the tiny house while we finish building but we’re so happy to finally be out at the property that I think the new excitement will outlast the construction phase…I hope.

Thanks again Terry for safely moving my baby!

Categories: Tiny House Living, Towing the Tiny House, Trailer | Tags: , , , , | 6 Comments

Installing Tongue and Groove Cedar

Pete and I spent the second weekend in May putting up the last of the vapor barrier and starting on the tongue and groove. It’s so satisfying to see the tongue and groove go up; things are really starting to come together.

The trickiest part of the vapor barrier was the sleeping loft and of course we left that for last. By the time we finished with the vapor barrier we jumped right in to the tongue and groove. We started at the easiest location, the wall behind the future couch. When we were finished with that we moved on to the ceiling in the sleeping loft. We were trying to work on areas that wouldn’t have any seams because our chop saw can’t do the cuts we wanted for seams. Instead, we would be borrowing my coworker Brian’s miter saw the following weekend. We borrowed this same saw when we put up the exterior cedar siding. When we finished with the ceiling in the sleeping loft we put up plywood in the kitchen area. Not only does this save us a few bucks but the metal plates covering the gas lines keeps us from being able to nail the three-inch wide cedar boards to parts of the wall. The following weekend we continued to make progress with the tongue groove.

Categories: Cedar Tongue and Groove, Vapor Barrier, Walls | Tags: , , , , , | 3 Comments

Vapor Barrier Going Up

May 4, 2014 – After taking the last few weekends off from building it was time to get back on track. I was working without Pete for the first time; he stayed in Marquette for the weekend to supply sugar maple logs for a shiitake mushroom growing workshop. The trees were cut from our property and in return for supplying the trees we were given 10 inoculated logs. It will take about a year before they produce any mushrooms, but once they start the logs should be productive for at least 5 years. I was able to make it back to Marquette in time to attend the workshop and I took some photos that I’ll post soon.

I finished spraying foam around the windows and filled the cavity of the wheel wells with spray foam as well. I was very fortunate to have help from my mom this weekend. She helped stuff extra insulation in the areas the blower hose missed and helped me put up most of the vapor barrier. It definitely would have been a near impossible task for one person; thanks mom!

Initially Pete and I were going to skip the vapor barrier. It’s been important to me to use as few toxic/off-gassing materials as possible within reason and I really did not want to wrap the house in plastic. We’ve also seen several other tiny house builders hand place wool insulation behind the tongue and groove walls, skipping the vapor barrier. However, my brother the builder strongly suggested we put up a vapor barrier. Not only will it help keep condensation out of the walls, it will also increase our R-value which is super important in our climate. Especially since we will be heating with propane and propane is not cheap! So, we sucked it up and bought a 100′ roll of 6 mil poly vapor barrier. I did read on some website that this type of plastic doesn’t do much off gassing and isn’t that toxic; however, I had a hard time finding any sort of information regarding environmentally friendly vapor barriers. Either way, I’m telling myself it’s perfectly healthy because it’s a done deal. I do plan on keeping the windows of the tiny house open all summer to help speed/eliminate construction material off gassing; it is after all a very tiny space!

Categories: Vapor Barrier | Tags: , , , | 5 Comments

Making Progress

Since the last post, we’ve gotten the electrical to the point where we can start insulating. We also had ALK Contracting out to run our gas lines. They are a small local company that specializes in heating, cooling, and plumbing. And while Pete and I ran our internet and cable lines, we hired Aire Care out of Houghton to finish up the job for us. We didn’t have the necessary tools to put the ends on the wires and cables and really we just wanted to make sure we were doing it right. We worked with Roger, who stopped by on a Sunday on his way to camp and showed him what we were working on. He came back out a few days later and finished things up; super nice guy!

We’re installing an oven range vent hood to help with humidity while cooking.  We bought an under cabinet mounted hood that will vent straight out the back.  We located the area where we wanted to the hood to be installed and started making the opening.  We wanted the range hood to be up as high as possible and started hacking into our top plate before going outside to realize that the vent opening would interfere with our soffit.  We relocated the opening so it comes out just below the soffit.  We also had to cut into a stud, so we placed another stud next to it.

As for our gas lines, we had to run three separate lines because we would not have access to the lines in the wall.   When it comes time to install the appliances we’ll have a professional come out to finish the job.  At that time, the tiny house will be out at the property so we’ll have to find another company to finish it up.

And finally, last weekend we put up the netting that came with our wool insulation. We’re scheduled to rent a blower tomorrow morning to blow in the insulation. After that, we’ll be able to put up our vapor barrier and start putting up the tongue and groove cedar.


Categories: Electrical, Insulation, Kitchen, Propane Lines, Soffits | Tags: , , | 12 Comments

Create a free website or blog at WordPress.com.