Tiny House for Sale?

First off, let me start by saying, I LOVE MY TINY HOUSE!

We have no regrets building it either.  We both learned a lot and mostly, had fun during the process.  But, we don’t actually live in our tiny house. Yes, it’s our bedroom in the non-winter months. And it’s where we stay if we have company since the current home is just a one bedroom. But other than that, it’s just something very pretty to look at and sit in and daydream about the life we thought we were going to have.

When we started building the tiny house, our thoughts were that we would live simply, and maybe just work seasonally.  But then, we were bit by the farming bug.  And not to say a farmer can’t live in a tiny house – I’m sure some do, but with farming comes a lot more stuff and that doesn’t always work with tiny.

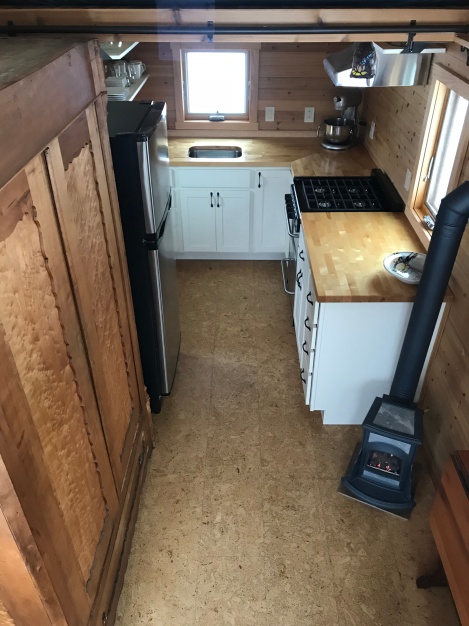
Probably the real reason we never lived in the tiny house is because while I was looking to live simply off-grid – Pete was looking to live with unlimited electricity and out buildings (it took him one winter off-grid in the tiny house to realize that).  As a compromise we purchased our current farm with a rough, fixer upper “pole barn” house and it was just easier to live in the “pole barn” house than in the tiny house.  We intentionally kept the tiny house simple without running water and because we wanted a larger kitchen, we skipped putting in a bathroom with the intention of building a sauna/bath house next to the tiny house.  As a result, the tiny house didn’t serve us the way we needed it to.

We’ve talked about listing the tiny house on Air B&B and we’ve talked about putting it on the original property to serve as our “camp”, but because we love it so much, it just seems like someone who will actually live in it as their home should enjoy it as much as we have.  With that – we think we’re ready to sell.

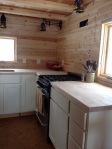
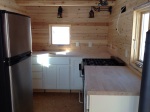
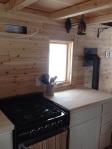
If anyone is interested in purchasing our tiny home, most if not all information can be found in this blog.  We wrote about pretty much the entire building process. Any other questions can be emailed to thehomesteadfarmanddairy@gmail.com.  We are asking $39,000.  Every build and design decision that went into the tiny house was done with quality and health in mind.  We didn’t skimp on materials and we always chose the least toxic most environmentally friendly building materials possible.

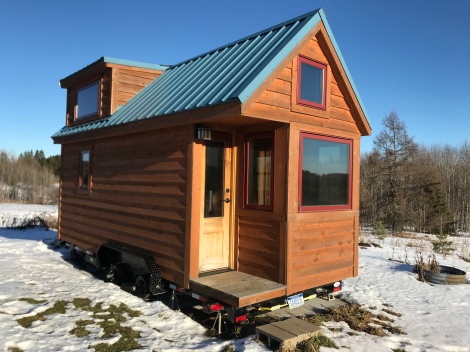
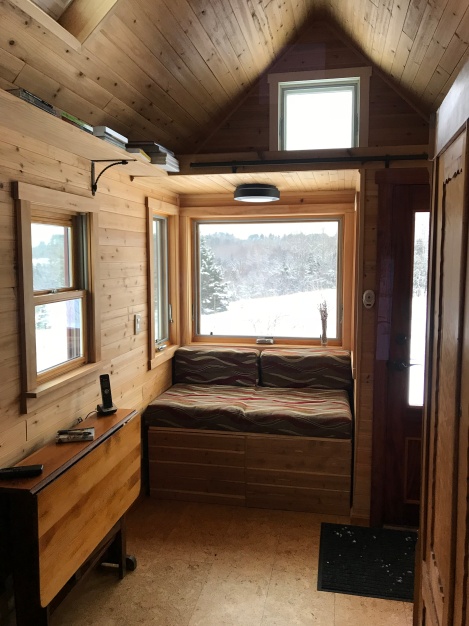
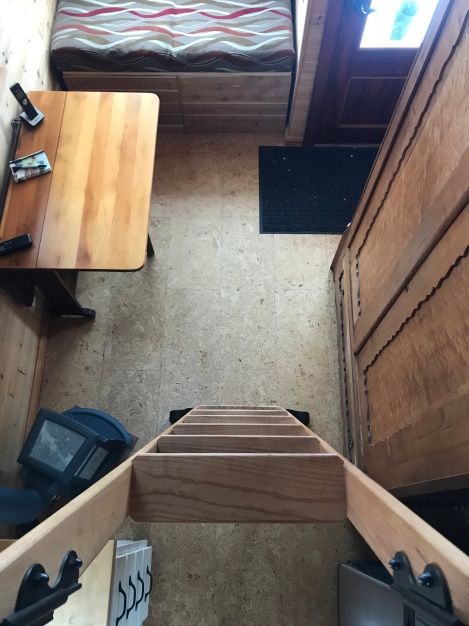
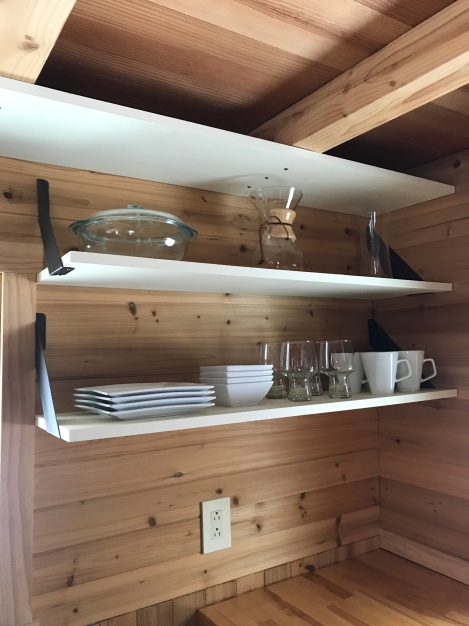
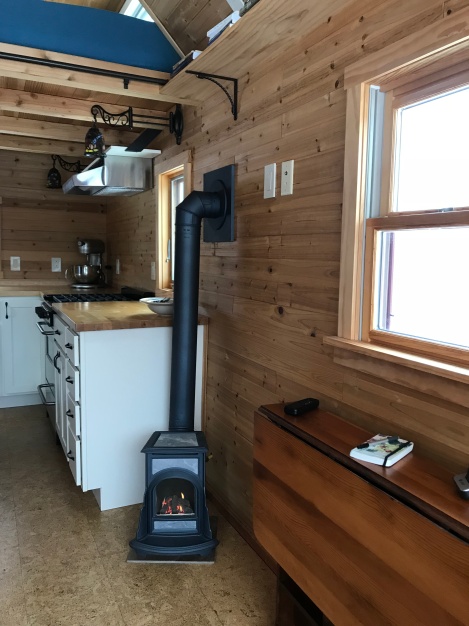
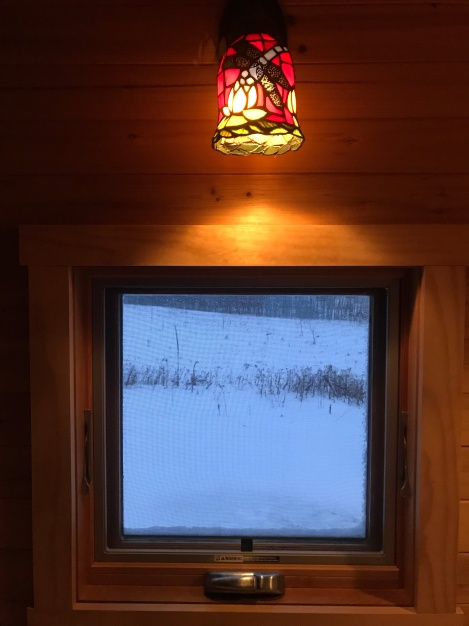
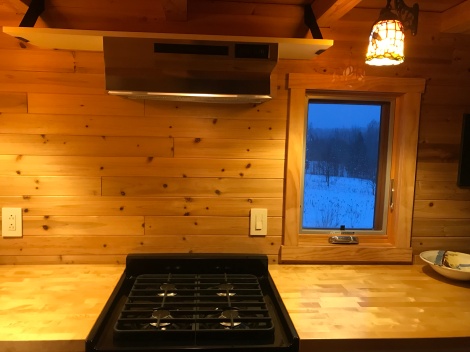
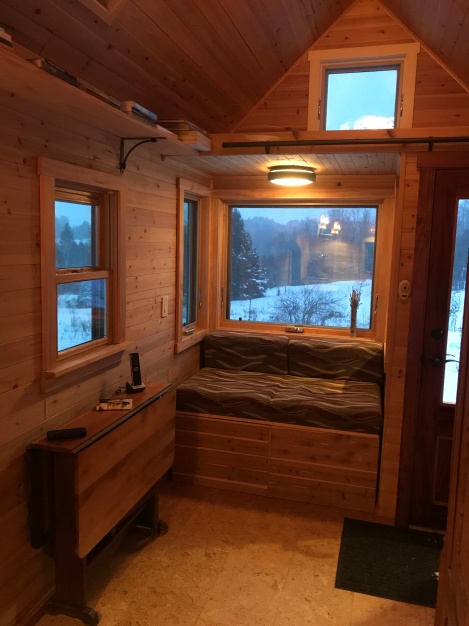
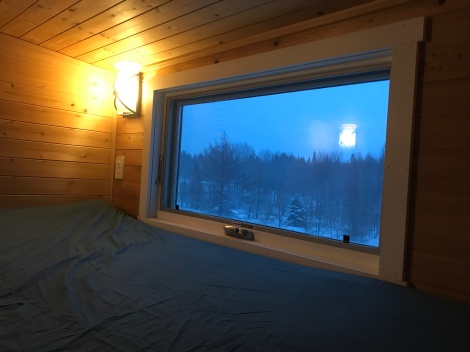
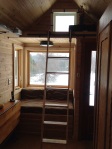
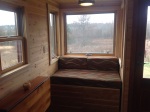
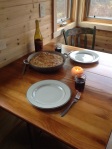
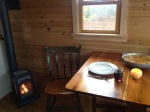
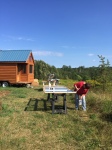
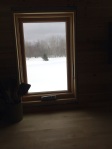
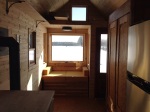
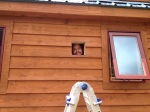
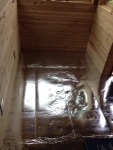
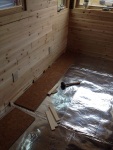
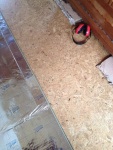
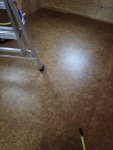
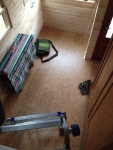
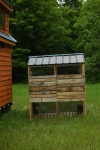
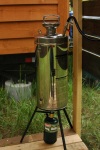
I always intended on having a post full of final pictures but the tiny house never seemed done. I think that’s because we never really made it our home. But below is what it looks like now.  Enjoy!


img_3077img_3097img_3100img_3103img_3105img_3107img_3109img_3111img_3115img_3117img_3119img_3128img_3141img_3144img_3145img_3147img_3151img_3157

Categories: Tiny House For Sale, Tiny House Living | Tags: , , , | 4 Comments

Finally…A Ladder!

We probably could have had a ladder a while ago had we not decided on a crazy expensive one.  Instead, we decided we wanted a rolling library ladder that easily rolled out of the way when not in use.  There are only a few companies that make the hardware for rolling ladders and they all charge quite a bit for it.

We were able to save some money by building the actual ladder ourselves.  One of our big box building stores sells furniture quality wood and we were able to pick up some nice maple boards.  After cutting and routing all the boards we put on two coats of pure tongue oil  and assembled the ladder.

When not in use, the ladder stores in between the armoire and fridge and when we need to get into the storage loft, we just pick it up and put it on the opposite rolling track.  We’re super happy with how it all came out and it’s so nice to finally be rid of the big, heavy, construction ladder that was always in the way.

Categories: Tiny House Furniture | 8 Comments

Cute Couch

Before winter set in and my mom went south, she sewed us couch cushions for the make-shift couch we built the winter before.  There wasn’t a lot of variety at the fabric stores in town, but we found something that we thought was suitable and I think it turned out beautiful.  Thanks mom!

At some point down the road, we will probably try to find a couch with a pull out bed that will fit in our little window nook, but in the meantime this couch is a nice cozy place to sit and enjoy the view.

Categories: Tiny House Furniture | 6 Comments

Happy Anniversary

Pete and I celebrated seven years of marriage on October 24.  Usually we go out for a fancy dinner and a nights stay at The Landmark, one of Marquette’s nicer hotels. However, this year we decided to make a nice dinner at home and eat in the tiny house.  We made one of our favorite recipes, Jamie Oliver’s Guinness steak pie in puff pastry, and enjoyed some nice wine. It was very nice to stay home and enjoy each other’s company in our almost completely finished tiny house.  We might just make that our new anniversary tradition!

Categories: Uncategorized | 7 Comments

October 1st Deadline – Come and Gone

October 4, 2015 – While I didn’t meet my self-imposed deadline to officially finish the tiny house, we have made some serious progress.  We’ve held my mom hostage a few times and put her to work painting and varnishing our windows. It’s time-consuming and tedious work and I’m super thankful my mom was willing to do it. While she spent a few long weekends working on windows, I’ve been working on the trim work; also time-consuming and tedious.  And while my mom and I have been working on the tiny house, Pete has been working on farm projects; the tedious finishing work is not his forte.

Other tasks my mom took on was varnishing the counter top and refinishing the cherry drop leaf table she gave us for the tiny house.  Thanks Mom!

We recently dug a trench for a gas line so we could hook up the tiny house to the large propane tank. We also decided to have a concrete slab poured for the tiny house to sit on.  The slab is complete and we moved the house onto the slab this morning. We have to wait until next week to have the gas line hooked up and then we’ll get an electrician out to run power to the house.  I have more trim and molding to install and will tung oil the walls when that’s complete. And of course, we still need to build the ladder.

Once all of the above is done, we’ll move back in. At that point, I’ll call the house done.  However, it will still need kitchen shelves, a couch, two storage ottomans for our feet/dining chairs, and any other finishing touches that make a house a home. But, we’re getting there! 🙂

Categories: Finishing Touches | Tags: | 8 Comments

A Long Overdue Update

Spring has finally sprung here in the U.P. and Pete and I have been busy. Since the last blog post, which was back in November, kitchen cabinets and countertops were installed in the tiny house and we bought another piece of property.

Since the new property is probably the most surprising update, I’ll start there. Winter in the U.P. is hard; winter in the U.P. off-grid is even harder. Particularly trying to start a generator in the howling wind when it’s -20 degrees outside. It’s bad enough when the generator doesn’t start on the first five pulls but then when the recoil snaps back at a high rate of speed through your already frozen fingers it’s enough to make you swear every obscenity you know and wipe the frozen tears from your eyes. And then there’s the outdoor shower! 🙂

Prior to finding and buying the property that we’ve been living on, we tried to buy a piece of property 1 mile up the road. I wrote about our land search in a previous post, “We Bought Land“. When Pete and I first looked at this original property all we had to do was drive up the driveway and we both knew instantly that we were going to make an offer. This place is definitely not for everyone. Anyone looking to purchase a “house” would not be interested in this property. While the person we purchased it from had been living here since 1997, technically there is not a house on the property. Which was fine by us, because we’ve been building our house. The property is 26 acres, with an animal barn, a pole barn, and a wood shed/chicken coop. The pole barn is half garage, half one bedroom, one bath house with partical board walls.

When we made our original offer, the seller did not accept and didn’t even bother to counter-offer. We increased our offer, and again, she was not interested, so we moved on. By the time she changed her mind and wanted to accept our second offer we were already in the process of purchasing the other property. Since that time, the seller, had lowered her asking price to less than our first offer and buying the property stared to make sense.

Our goal since we started building the tiny house and buying land has been to start a small farm. What we quickly learned when we moved the tiny house out to the property was that starting a farm was going to cost a lot of money and take a very long time. We moved the tiny house to land without power, without water, without any buildings, without fencing. We liked the idea of starting a farm from scratch but quickly realized that a farm was not in our immediate future going this route. The new property on the other hand, has everything we need to start farming right away.

Because life in the tiny house off-grid during the winter had been very challenging, we moved into the “pole house” when we closed on the property back in February. As soon as the roads are dry, we will move the tiny house to the new property, officially finish it, and move back into the tiny house. We will use the “pole house” for its bathroom, anytime we need a larger kitchen (think canning and cheesemaking), and it will be the guest house when we have company.

And, because we bought property with a barn and bad fencing, we of course, purchased a cow. A little sooner than we had planned, but when a good family dairy cow comes along you really shouldn’t hesitate. We also had been raising laying chicks for the last six weeks but on a very sad note they had a bad encounter with a weasel two nights ago and they are no more. I am making it my mission to weasel proof the coop and will not let this happen again!

Back on the tiny house front, Pete and I installed the kitchen cabinets and we hired our neighbor Randy to install our countertops. The tiny house to-do list is much shorter now and consists of trim work, sealing the tongue and groove walls and countertops, installing the rolling library ladder and range hood, purchasing a couch and putting up kitchen shelves. Once all these tasks are finished we’ll move back into the tiny house. We were also having a difficult time with condensation in the tiny house over the winter, something that is not uncommon among other tiny-housers. We will need to address this issue prior to next winter; being able to run the refrigerator off electric instead of propane should help.

Enjoy the pictures and I will try my best to be a more consistent blogger.

Categories: Tiny House Living | 14 Comments

Heating Our Tiny House

Living in Michigan’s Upper Peninsula means 6-8 months of winter; we’ve had winter show up in October and not leave until May. There are quite a few options for heating a tiny house and each option has its pros and cons. When it came to heating our tiny house, our first thought was to heat with the Newport Dickinson propane fireplace. This is the stainless steel wall mounted direct vent heater that you see in so many tiny houses. We liked the clean stainless steel look and the glass window that revealed the flame. What we didn’t like about the Dickinson was that it is either on or off, and on high or low. We didn’t realize it at the time we made our decision, but because we have a propane refrigerator, it is imperative that we be able to keep the ambient temperature above 61 degrees or the fridge will go to freezing temperatures (apparently that’s just the way propane fridges work). With the Dickinson, we would have had to keep it running at all times.

Prior to buying our property we wanted to put in electric in-floor heat; however, once we found our property, we knew we were going to be off grid for a while. This ruled out all electric heat options. That left us with propane or wood. We looked at other wall mounted direct vent propane heaters, but I found most of them to be very unattractive and they also needed a certain wall depth that we didn’t have with our 2×4 walls.

The property we purchased has about 20 acres of woods, so heating with wood would be the most cost-effective heating method because it would be free if you don’t count the cost of our time cutting, chopping, and hauling wood. However, a wood fireplace has many drawbacks in such a small space. First and foremost, you can’t keep the house at a certain temperature. This would mean coming home after work to an extremely cold house. Also, because the house is so tiny, it would require an equally tiny wood stove. While tiny wood stoves do exist, keeping a fire burning throughout the night in such a small wood stove would not be possible, leaving us with either waking up to a cold house or getting up in the middle of the night to stoke the fire. We’ve lived in a house that we heated with wood and even with its large cast iron fireplace, we still often woke up in the morning having to re-start a fire. I also wasn’t too keen on the mess associated with wood heat. In a “normal” sized house, there is space for a large hearth with wood and kindling storage, but in the tiny house it would be difficult to keep ashes contained and store everything necessary with wood heat.

It became very clear that the best option for us would be to heat with propane, but we still had to find the right heater. In searching for heaters I came across a blog post all about heating tiny houses. In that post was a link to the Mini Franklin stove from the Woodstock Soapstone Company. The website claimed that the Mini Franklin would heat a space 100-400 square feet. We also found it to be very attractive, featuring a glass window to view the flame and cast iron and soapstone construction. What we liked even more was that we could add on a thermostatically controlled remote control giving us the ability to set the temperature or program the stove to a heating schedule.

We decided that this would be our stove of choice and began planning for its placement in the tiny house. We couldn’t afford to buy the stove at that time so we looked at the installation manual, made the necessary measurements, and located the place on the wall where the stove-pipe would vent to the outside of the house. We were required to frame in the opening on the wall where the pipe would go out and we installed our tongue and groove everywhere else. When we were finally able to purchase the stove we realized that our measurements apparently didn’t take into account the added hight due to the bend in 90 degree pipe elbows and our opening was 1-2 inches too low. We had to cut away some of the tongue and groove cedar and cut out the 2×4 that framed the opening and install it higher. We’ve had far worse goof ups so while this was inconvenient, it really wasn’t that difficult a fix.

There was some trial and error when installing the stove-pipe but eventually it all came together and we couldn’t be happier with our choice. The stove was installed at the end of September and just prior to installation we were experiencing some rather cold nights. We were able to set the thermostat to 62 degrees and the stove would kick on as needed. We found during that first month of having the stove that it didn’t really need to kick on very often. The propane fridge that we have (a post on the cook stove and propane fridge will come eventually) kicks out quite a bit of heat and during the fall it was almost heating the tiny house on its own, with the fireplace only kicking on at night. Now that winter is officially here (we have already had up to 4 feet of snow fall) the fireplace is on fairly consistently but has done a great job heating the tiny house. Most of the time, we just keep the house at 62 degrees, but the fireplace has no problem bringing the house temperature up to 70 degrees if we crank the heat. It’s too soon to tell how much propane we will go through, but we purchased two 100 pound propane tanks and have gone through two tanks since the end of September (the first tank lasted 6 weeks; the second tank lasted 3 weeks). We have a local farm store nearby that currently charges $82 to fill a 100 pound tank. We figure, at the most, we would go through two tanks a month in the winter, leaving us with a gas bill of $164/month. It’s quite likely that propane prices will go up throughout the winter, but with that being our only utility bill we don’t think that’s too bad.

The only complaint I had with the gas stove is how the company handles the painting of the stove-pipe. The pipe sections come with stickers labeling the type of pipe. The company either paints around the sticker or they put another sticker over the label and paint over the whole pipe. It looks terrible. Granted, I am a rather picky person. I formally complained to the company and they sent us a can of spray paint. I was able to peel off the stickers and repaint the sections. There was some sticker residue that was left behind but overall once I put a few coats of new paint on it wasn’t too noticeable.

I would definitely recommend the Mini Franklin to other tiny housers. It’s incredibly easy to light, looks very attractive, and keeps the house at very comfortable temperatures.

Categories: Fireplace, Refrigerator | Tags: , , , , , , | 28 Comments

Cork Flooring Installed*

*This post is being written several months after the fact as I am a slacker and haven’t kept up with the blog. My memory may be faulty on some accounts.

August 16, 2014 – Getting tired of walking on OSB floors and trying to keep them swept, we installed the cork flooring this weekend. We decided to go with cork floors as opposed to wood because we wanted something a little softer on the feet. Pete and I like to cook and it’s not uncommon for us to spend a whole day in the kitchen. We’ve lived in places that had hardwood floors in the kitchen and it didn’t take long before your feet and legs were sore; we thought cork might have a little more give. We also felt the cork offered a tad more r-value than wood flooring.

We ordered the flooring from Lowe’s and watched a couple of YouTube videos on how to install it. The cork came in 1/4 inch 3 foot by 1 foot sheets. They lock together and were relatively easy to install. We ran the sheets down along the long side of the tiny house to maximize the amount of flooring. Initially I wanted to run it starting on the short side but that would have required a lot more cutting and we probably would have had to order another box or two of flooring. We ended up needing seven boxes of the flooring and we had a couple of sheets left over. Cost wise we spent around five or six hundred. A vapor barrier has to be installed under the cork and we went with a slightly insulating vapor barrier to make the floor is as warm as possible.

Having been walking on the cork flooring for almost three months I can say we are pleased with our choice. The flooring is more gorgeous than we could have imagined. It was relatively easy to install; by our second to last row we had a system in place and we were able to consider ourselves cork flooring installation experts. It is definitely softer under foot and because of that our temporary folding chairs have left their mark. The small dents are only noticeable in certain light when looking down at an angle. Instead of being upset about the wear and tear I’m telling myself that we’re going for the distressed look.

Stay tuned for more outdated blog posts.

Categories: Floor, Flooring | Tags: , | 4 Comments

The Tiny House Has Insurance!

Just before moving the tiny house out to the property I called Vast here in Marquette to inquire about insurance. I spoke with Karen and explained that I wanted to make an appointment to discuss insurance. When she asked for more imformation I explained that we were building something called a tiny house. She asked if she could find information about them online and I assured her that if she googled “tiny house” she would find more than enough information. I made an appointment to go to the office later that afternoon. When I showed up for the appointment Karen asked all sorts of questions about our little house. What was the square footage, how much had it cost so far, would it have a smoke alarm, would we anchor it to the ground…

She also told me that she called her insurance underwrite after she got off the phone with me and explained that she had a couple looking to get insurance for a tiny house. Her underwriter knew all about tiny houses and wanted to get one himself!

The tiny house is insured under a mobile home policy with a premium just under $400 a year. Compared to someone with a “real house” worth a couple hundred thousand dollars our policy seems rather pricy; however, in the insurance world, mobile homes are considered riskier and at $32 dollars a month we think it’s worth the price. I spoke with a coworker who’s camp is a mobile home and asked him what his premium was and he explained that he can’t get insurance on his camp because the mobile home is too old and that he would gladly pay $400 a year for coverage if he could get it.

Our policy covers $25,000 on the structure, $17,000 on personal belongings (I doubt we could even fit enough belongings in the tiny house to equal that), and $300,000 liability on the property. I did make an appointment with another insurance agency in town to compare policies. The other agent I spoke with seemed skeptical about being able to insure the tiny house, but he did say that the Vast policy looked about right. He told me he would look into things and call me back either way…I never heard back from him.

We did have to wait to get our physical address before we could sign our policy and that involved calling the Sheriff’s Department to request a fire number. The fire number took a few weeks to be issued but once I was able to give Vast our physical address we were insured. And I did confirm that we’re covered if the house is stolen!

Categories: Tiny House Insurance, Tiny House Living | Tags: , , | 15 Comments

We Have a Shower

When we first started designing the floor plan of our tiny house, we were planning on putting in a small bathroom like so many of the other tiny houses out there. We had concerns, however, regarding freezing issues in the winter. We weren’t quite sure how we were going to handle the gray water coming from the shower. You can buy heating pads for a gray water tank, but those require electricity; something we don’t have here at the property. As far as dealing with black water, we were planning on having a composting toilet. However, after speaking with our local health department, we were informed that composting toilets are not allowed and neither are incinerating toilets. After being told that, we decided to eliminate the bathroom in the tiny house all together and eventually build a sauna bath house next door. The reason we called the health department in the first place is because friends of a friends home was condemned by the health department when they found out they had a composting toilet. They weren’t exactly on the up and up, so I’m told, so that didn’t help their situation either.

In the meantime, we are renting a porta potty and have built an outdoor shower. In the next coming months, we will build an outhouse and pay the health department $200 for a privy permit application fee. Prior to building the outdoor shower, we purchased something called the Zodi Extreme. It consists of a stainless steel canister (looks like a milk can) that sits atop a propane burner. There is a thermometer on the side to let you know how hot the water is and when it gets to your desired temperature you manually pressurize the tank with a pump at the top. Then you turn on your nozzle and enjoy a hot shower. It works quite well and we would highly recommend it. They also have battery operated units as well.

For the first couple of weeks we were using the shower without any sort of enclosure; but I prefer to have a tad more privacy and wanted an actual showering space. Keep in mind, we are on 40 acres and have no neighbors within sight of the tiny house, but I still wanted a shower enclosure.

Pete gave me quite a bit of grief when I wanted to hold off on working on the inside of the house to build a shower. He thought it was a huge waste of time. He has since realized how nice it is to have a place to shower, away from the bugs.

The design for the shower was in my head and rather than drawing out plans we started cutting and piecing together the enclosure. A few changes were made along the way and while the shower is perfect for us, it wouldn’t be ideal for a tall person. We made the base out of treated lumber and bought untreated 2×4’s for the uprights. Our friend Jeff stockpiled some pallets for us for the siding and we screened the whole thing in with netting to have a bug free experience (the mosquitos are the worst they’ve ever been!). We used some scrap metal roofing for the top which we plan on painting to match our roof. The most expensive part of the project was the roll of screen, but we have a lot left over.

Now that the shower is complete we can get back to finishing the tongue and groove inside the tiny house

Categories: Outdoor Shower, Tiny House Living | Tags: , , | 25 Comments

Create a free website or blog at WordPress.com.